
Inversion therapy, facilitated by inversion tables, has gained popularity for its potential to alleviate back pain, improve circulation, and enhance overall well-being. To fully unlock the benefits of an inversion table & Inversion Therapy, it’s crucial to understand proper setup, usage techniques, and safety precautions. This comprehensive guide provides a step-by-step approach, dos and don’ts, common mistakes to avoid, and helpful tips for beginners venturing into the world of inversion therapy.
How to Properly Set Up an Inversion Table
Unlock the full potential of your inversion therapy with our guide on ‘How to Properly Set Up an Inversion Table.’ Achieve maximum comfort, safety, and effectiveness by following step-by-step instructions for the ideal table configuration. Whether you’re a novice or experienced user, the proper setup lays the foundation for a seamless inversion experience. Explore key tips to choose the right location, adjust height settings, secure ankle supports, and set the inversion angle for an optimal and revitalizing inversion session.

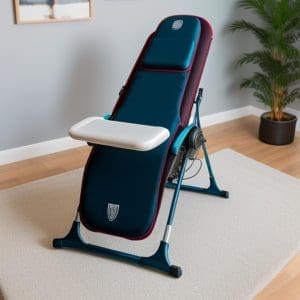
Setting Up an Inversion Table – Guide
Step-by-Step Guide for Using an Inversion Table
Achieving a safe and effective inversion experience begins with the correct setup of your inversion table. Follow these guidelines for a seamless setup:
- Select a Suitable Location: Choose a flat and spacious area with sufficient room for the full range of motion during inversion. Ensure there are no obstacles or hazards around the inversion table to guarantee a safe and unobstructed experience.
- Adjust the Height Settings: Customize the inversion table to your height by following the manufacturer’s instructions for height adjustment. Confirm that the ankle locking system aligns comfortably with your ankles, providing a secure and supportive fit.
- Secure the Ankle Supports: Place your feet into the ankle supports, ensuring a snug fit without applying excessive pressure. Verify that the ankle locking system is securely fastened before proceeding with the inversion. Properly secured ankle supports contribute to a stable and secure inversion.
- Set the Inversion Angle: Initiate the inversion experience with a minimal inversion angle, especially if you are a beginner. Gradually increase the inversion angle as your body adapts to the therapy. This progressive approach minimizes the likelihood of discomfort and allows for a smoother transition into more substantial inversion angles.
By adhering to these setup guidelines, you establish the foundation for a safe, comfortable, and effective inversion experience. Attention to detail during setup ensures that the inversion table caters to your individual needs, promoting optimal results from your inversion therapy sessions.

Guide to Inversion Table Therapy
Embarking on a safe and effective inversion session requires a step-by-step approach:
- Warm-Up: Prepare your muscles by engaging in gentle stretches or warm-up exercises before using the inversion table. This helps enhance flexibility and readiness for the inversion process.
- Gradual Inversion: Initiate the inversion experience with a slight angle, typically around 20-30 degrees. Gradual inversion allows your body to acclimate to the position slowly, reducing the likelihood of discomfort.
- Focus on Breathing: Incorporate deep and controlled breathing techniques during inversion. Inhale through your nose and exhale through your mouth to promote relaxation and enhance the overall experience.
- Stay Relaxed: Maintain muscle relaxation throughout the inversion. Avoid unnecessary tension, particularly in the neck and shoulders. A relaxed state contributes to a more comfortable and beneficial inversion.
- Duration of Inversion: Start with shorter sessions, initially ranging from 1 to 2 minutes. As your comfort level increases, progressively extend the duration over multiple sessions. This gradual approach ensures a smoother transition into lengthier inversion periods.
- Returning to Upright Position: Conclude the inversion session by slowly returning to an upright position. Allow your body to readjust gradually to the change in orientation. If your inversion table features handlebars, use them for added stability during the return.
By following this comprehensive guide, you can optimize the safety and effectiveness of your inversion sessions. Gradual progression, combined with mindful breathing and relaxation techniques, ensures a positive and comfortable inversion experience.
Guide to Inversion Tables
Dos and Don’ts of Inversion Table Usage
Ensuring a safe and effective inversion experience involves following key dos and don’ts:
Dos:
- Consult a Healthcare Professional: Prior to embarking on an inversion therapy regimen, consult with a healthcare professional, especially if you have pre-existing health conditions. Their guidance can help determine the suitability of inversion therapy for your individual health profile.
- Hydrate Before Inverting: Maintaining proper hydration is essential. Drink an adequate amount of water before using the inversion table to stay hydrated, supporting overall well-being during the session.
- Use Shoes if Necessary: If you experience discomfort in your ankles during inversion, consider wearing shoes with proper support. This can provide added comfort and stability, especially for individuals with sensitive or susceptible ankles.
Don’ts:
- Invert After Eating: Avoid using the inversion table immediately after consuming a meal. Inverting on a full stomach may lead to discomfort, bloating, or nausea. Allow sufficient time for digestion before engaging in inversion therapy.
- Overexert Yourself: Overexertion during inversion can lead to discomfort and increased risk of adverse effects. Gradually increase both inversion time and angle, allowing your body to adapt to the changes. This incremental approach minimizes the risk of overexertion and ensures a more comfortable and effective inversion experience.
By adhering to these dos and don’ts, you can promote a safer and more beneficial inversion therapy practice tailored to your individual needs and health considerations.

Common Mistakes to Avoid When Using an Inversion Table
Navigating inversion therapy successfully involves avoiding common pitfalls that may compromise your experience. Here’s a closer look at potential mistakes and how to sidestep them:
- Inverting Too Quickly: One prevalent mistake is initiating inversion too rapidly. Swift changes in position may lead to discomfort, disorientation, and an increased risk of dizziness. To mitigate this, adopt a gradual approach. Start with a modest inversion angle, allowing your body to adjust progressively. This measured approach minimizes the likelihood of adverse reactions, providing a more comfortable experience.
- Neglecting Proper Alignment: Maintaining proper alignment during inversion is paramount for safety and efficacy. Ensure that your body is correctly positioned on the inversion table, with your head, spine, and hips aligned. Misalignment may lead to uneven pressure distribution and discomfort. Take the time to set up your inversion table accurately, following the manufacturer’s guidelines. This simple step significantly contributes to a more beneficial and injury-free inversion experience.
- Ignoring Discomfort: Discomfort during inversion should never be ignored. If you experience pain, discomfort, or unusual sensations, cease the inversion immediately. Ignoring such signals can lead to potential injuries. Instead, consult with a healthcare professional to address any concerns and ensure that inversion therapy is suitable for your individual health circumstances. Prioritizing your well-being by promptly addressing discomfort contributes to a safer and more effective inversion practice.
By steering clear of these common mistakes and prioritizing a mindful and gradual approach, you can maximize the benefits of inversion therapy while minimizing potential risks.
Using a Inversion Table
Tips for Beginners Using an Inversion Table
Embarking on your journey with inversion therapy as a beginner? Here are essential tips to ensure a smooth and comfortable experience:
- Start Slow: If you’re new to inversion therapy, it’s crucial to ease into it gradually. Begin with a minimal inversion angle, typically around 20-30 degrees, allowing your body to acclimate to the unfamiliar position. As you become more accustomed and confident, progressively increase the inversion angle. Starting slow helps prevent discomfort and allows your muscles and joints to adapt at a comfortable pace.
- Use Support: During your initial sessions with the inversion table, consider enlisting the help of a friend, family member, or workout buddy to provide additional support. Having someone present can offer reassurance and assistance as you familiarize yourself with the equipment. They can help ensure proper alignment, provide guidance, and be there in case you need assistance returning to an upright position.
- Listen to Your Body: Perhaps the most crucial tip for beginners is to tune in to your body’s signals. Pay close attention to how your body responds to inversion. If you experience discomfort, dizziness, or any unusual sensations, it’s essential to listen to these signals and adjust accordingly. Stop the inversion immediately if you feel any pain or distress, and consult with a healthcare professional if needed. Your body’s feedback is invaluable in tailoring your inversion experience to your individual comfort and needs.
By incorporating these tips into your inversion routine, you’ll be better equipped to navigate the initial phases of inversion therapy, paving the way for a positive and beneficial experience.

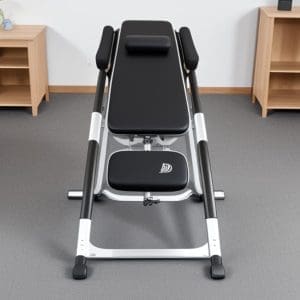
Different types of inversion tables
Conclusion:
Mastering the art of using an inversion table requires attention to setup details, proper technique, and adherence to safety guidelines. By following this comprehensive guide, individuals can embark on their inversion therapy journey with confidence, reaping the potential benefits for back health and overall well-being. Always consult with a healthcare professional before incorporating inversion therapy into your routine, especially if you have underlying health concerns.