
Inversion tables have become increasingly popular in recent years as people seek alternative methods for relieving back pain and improving overall well-being. These contraptions may seem intimidating at first, but with the right guidance, they can provide immense benefits. In this article, we’ll explore everything you need to know about using an inversion table safely and effectively.
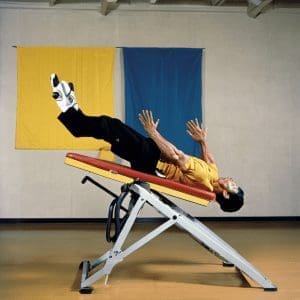
How to use an inversion table
Introduction to Inversion Tables
Inversion tables are specially designed equipment that allow you to hang upside down or at an inverted angle. This position is believed to decompress the spine, relieve pressure on the discs, and stretch the muscles, which can alleviate back pain and promote better posture.
Understanding How Inversion Tables Work
The principle behind inversion tables is simple: by flipping your body upside down, gravity can reverse the compression that occurs in the spine over time. This decompression allows for increased space between vertebrae, which can reduce nerve pressure and promote spinal health.
Benefits of Using an Inversion Table
Using an inversion table regularly can offer a myriad of benefits, including relief from back pain, improved spinal alignment, reduced muscle tension, better circulation, and even stress relief. Many users also report feeling taller and more energized after an inversion session. For a fuller understanding of the benefits of inversion table therapy read our blog post.
Safety Precautions When Using an Inversion Table
Inversion tables offer a promising avenue for alleviating back pain and improving spinal health. However, like any exercise equipment, they come with inherent risks if not used correctly. Prioritizing safety precautions is paramount to minimize the risk of accidents or injuries. Here are essential safety measures to consider when using an inversion table:
Safety Precautions When Using an Inversion Table
Starting at a Shallow Angle
- Begin your inversion session at a shallow angle, typically between 20 to 30 degrees, especially if you’re a beginner.
- Gradually increase the angle over time as your body adjusts to the sensation of inversion, avoiding sudden movements or extreme angles.
Securing Ankles Firmly
- Ensure your ankles are securely fastened to the ankle supports or bars using the provided straps or locking mechanisms.
- Double-check the tightness of the straps to prevent slippage or discomfort during inversion, adjusting as needed for a snug yet comfortable fit.
Having Assistance Nearby
- Always have someone nearby, especially during your initial attempts at inversion or if you experience any discomfort or dizziness while inverted.
- This individual can provide assistance if you need help returning to an upright position or in case of any unexpected issues during your inversion session.
Safety Precautions Comparison Table
| Safety Measure | Description | Importance |
| Starting at a Shallow Angle | Initiating inversion at a low angle to acclimate gradually | Prevents sudden discomfort or dizziness |
| Securing Ankles Firmly | Ensuring ankles are securely fastened to prevent slippage | Minimizes risk of injury or instability |
| Having Assistance Nearby | Having a companion nearby for assistance and safety | Provides immediate aid in case of emergencies |
Incorporating these safety precautions into your inversion table routine is crucial for a safe and effective experience. By starting slowly, securing your ankles properly, and having assistance nearby, you can maximize the benefits of inversion therapy while minimizing the risks associated with its usage. Remember, safety always comes first when it comes to inversion table exercises.
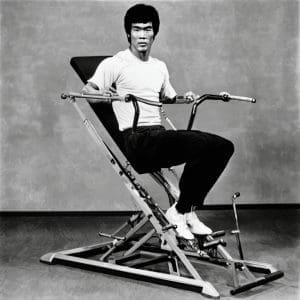
How to use a inversion table safely
How to Choose the Right Inversion Table
When selecting an inversion table, consider factors such as weight capacity, adjustability, comfort features, and safety certifications. It’s also wise to read reviews and consult with a healthcare professional if you have any underlying medical conditions.
Setting Up Your Inversion Table
To maximize the benefits of inversion therapy and ensure a safe and comfortable experience, proper setup of your inversion table is essential. Follow these steps to set up your inversion table correctly and tailor it to your specific needs:
Assembly Verification
- Before use, carefully inspect the inversion table to ensure it has been assembled correctly according to the manufacturer’s instructions.
- Check all components, including frame, hinges, straps, and ankle supports, to confirm they are securely in place and free from defects.
Height and Weight Adjustment
- Adjust the inversion table to accommodate your height and weight specifications as outlined in the manufacturer’s guidelines.
- Proper adjustment ensures optimal positioning during inversion, reducing the risk of discomfort or instability.
Secure Ankle Supports
- Ensure the ankle supports are securely fastened and properly aligned with your ankles.
- Double-check the tightness of the straps to prevent slippage or discomfort during inversion, adjusting as needed for a snug fit.
Setting Up Your Inversion Table Comparison Table
| Setup Step | Description | Importance |
| Assembly Verification | Confirming correct assembly and absence of defects | Ensures structural integrity and safety |
| Height and Weight Adjustment | Customizing settings for optimal positioning | Enhances comfort and stability during inversion |
| Secure Ankle Supports | Ensuring proper alignment and tightness of ankle supports | Minimizes risk of slippage or discomfort |
By following these steps and ensuring proper setup of your inversion table, you can optimize your inversion therapy experience and reap the full benefits of spinal decompression and pain relief. Remember to always prioritize safety and consult the manufacturer’s guidelines for specific instructions tailored to your inversion table model.
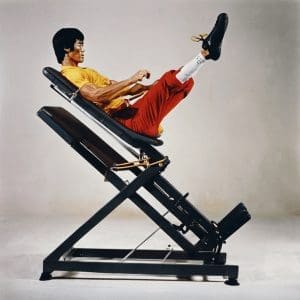
How to use a inversion table properly
Proper Techniques for Using an Inversion Table
Inversion therapy can offer significant relief for back pain and spinal issues, but mastering the proper techniques is crucial for a safe and effective experience. By following these guidelines, you can maximize the benefits of your inversion table while minimizing the risk of discomfort or injury:
Start Slowly and Gradually
- Begin with short inversion sessions, starting at a shallow angle of around 20 to 30 degrees.
- Gradually increase both the angle of inversion and the duration of your sessions as your body becomes accustomed to the sensation.
Smooth and Controlled Movements
- Keep your movements smooth and controlled throughout the inversion process, avoiding sudden or jerky motions.
- Engage your core muscles to maintain stability and control while inverted, focusing on a steady descent and ascent.
Listen to Your Body
- Pay close attention to your body’s signals during inversion, and heed any signs of discomfort or strain.
- If you experience any discomfort, dizziness, or unusual sensations, stop the inversion immediately and return to an upright position.
Proper Techniques Comparison Table
| Technique | Description | Importance |
| Start Slowly and Gradually | Gradually increasing angle and duration for acclimation | Prevents sudden discomfort or strain |
| Smooth and Controlled Movements | Maintaining steady motions throughout inversion | Minimizes risk of injury or instability |
| Listen to Your Body | Paying attention to signals of discomfort or strain | Ensures immediate response to potential issues |
By adhering to these proper techniques for using an inversion table, you can safely and effectively incorporate inversion therapy into your routine. Remember to start slowly, maintain controlled movements, and prioritize listening to your body’s cues to ensure a positive experience and maximize the benefits of inversion therapy for your back health.
How to use an inversion table for back pain
Using an Inversion Table for Alleviating Back Pain
Inversion therapy stands out as a promising method for mitigating the discomfort caused by various spinal conditions such as degenerative discs, herniated discs, or spinal stenosis. The gravitational force exerted on nerve roots due to these conditions often manifests as sharp pains in the back, buttocks, legs, and feet. By flipping the body upside down, inversion therapy aims to expand the space between vertebrae and alleviate the pressure on nerve roots. Research indicates its efficacy in short-term pain relief, particularly for fresh back injuries. Utilizing an inversion table facilitates controlled inversion, gradually acclimatizing the body to more extreme angles over time.
Mastering Inversion: A Step-by-Step Guide
Method 1: Inversion Table Operation
Step 1: Securing the Table Ensure the inversion table is firmly set on a level surface, verifying the proper connection of joints, straps, and pivot points before each use to prevent accidents. Thoroughly review the instructional manual to understand weight-bearing limitations and operational nuances. Having a companion during the initial attempts is advisable for added safety.
Step 2: Footwear Considerations Wearing athletic shoes offers enhanced stability when the table locks into position, providing essential support. Bare feet usage is discouraged to mitigate potential risks.
Step 3: Positioning Stand facing away from the table and gradually elevate your feet onto the designated steps. Maintain a straight-backed posture while pulling the lever to secure your feet firmly.
Step 4: Harnessing Safety Mechanisms Secure the straps across your body as per the table’s design specifications, ensuring all safety features are engaged before initiating inversion.
Step 5: Execution Grasp the table’s straps firmly on both sides, employing them to initiate inversion smoothly.
Step 6: Recovery Phase Upon resuming an upright position, allow 1 to 2 minutes for blood circulation adjustment before disengaging from the table.
Method 2: Inversion Routine for Alleviating Back Pain
Step 1: Medical Guidance Incorporate inversion therapy into your treatment regimen under professional supervision, as it primarily offers mild relief and is seldom recommended for chronic pain management. Complementary treatments such as anti-inflammatory medications, physical therapy, and epidural injections may be warranted for comprehensive care.
Step 2: Exercise Caution Adopt gentle movements during inversion sessions to prevent exacerbating existing discomfort.
Step 3: Secure Positioning Ensure proper alignment on the inversion table before transitioning to a horizontal orientation, allowing time for circulatory adjustments.
Step 4: Progressive Inversion Gradually increase the inversion angle to 45 degrees while maintaining controlled breathing patterns.
Step 5: Optimizing Traction Elevate your arms above the head to enhance spinal traction, ensuring stability on the table before implementation.
Step 6: Gradual Intensification Progress to longer inversion durations and steeper angles over subsequent sessions, aiming for 25 degrees initially and advancing gradually.
Step 7: Frequency and Duration Employ the inversion table at least thrice daily or as needed for acute pain management, customizing the regimen based on individual comfort levels.
Step 8: Customization and Monitoring Maintain a pain journal to track progress and tailor the inversion routine according to personal efficacy and comfort thresholds.
Incorporating inversion therapy into your back pain management strategy can offer significant relief when executed diligently and under appropriate guidance. By mastering the operation of an inversion table and adhering to a structured inversion routine, individuals can alleviate discomfort and enhance overall well-being. Remember, consistency and moderation are key to unlocking the full potential of inversion therapy in combating back pain.
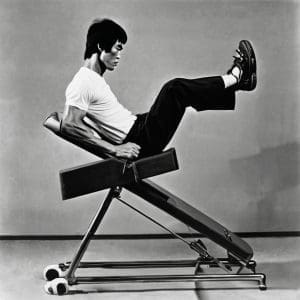
How to use a inversion table for different exercises
Different Inversion Table Exercises
In addition to simply hanging upside down, there are various exercises you can perform on an inversion table to target different muscle groups and improve flexibility. These may include stretches, core exercises, and inverted yoga poses.
Inversion therapy offers a unique approach to alleviate back pain and improve spinal health. Beyond merely hanging upside down, incorporating targeted exercises on an inversion table can further enhance its benefits. These exercises target different muscle groups, promote flexibility, and strengthen core stability, contributing to overall well-being.
Exploring Inversion Table Exercises
Stretching Routine
Stretching while inverted can provide relief from muscle tension and enhance flexibility. Here are some effective stretches to incorporate into your inversion table workout:
- Hamstring Stretch: Extend your legs straight while inverted, reaching towards your toes to stretch the hamstrings.
- Hip Flexor Stretch: Bring one knee towards your chest while keeping the other leg extended, feeling the stretch in the hip flexors.
- Back Stretch: Reach your arms overhead while inverted to elongate the spine and alleviate tension in the back muscles.
Core Strengthening Exercises
Engaging the core muscles while inverted helps improve stability and support for the spine. Try these core exercises on your inversion table:
- Inverted Crunches: With your hands behind your head, lift your upper body towards your knees while inverted, engaging the abdominal muscles.
- Leg Raises: Extend your legs straight while inverted and lift them towards the ceiling, targeting the lower abdominal muscles.
- Side Twists: Rotate your torso from side to side while inverted, engaging the obliques for a full core workout.
Inverted Yoga Poses
Yoga poses adapted for inversion therapy provide a holistic approach to spinal health and flexibility. Incorporate these inverted yoga poses into your inversion table routine:
- Downward Facing Dog: Position yourself with your hands on the table and hips raised towards the ceiling, elongating the spine and stretching the hamstrings.
- Child’s Pose: Sit back on your heels while inverted, reaching your arms forward and lowering your chest towards the table to stretch the spine and shoulders.
- Bridge Pose: With your feet on the table and hips lifted, arch your back while inverted, engaging the back muscles and opening the chest.
Different Inversion Table Exercises Comparison Table
| Exercise Type | Targeted Muscles | Benefits |
| Stretching Routine | Hamstrings, hips, back | Improved flexibility, muscle tension relief |
| Core Strengthening | Abdominals, obliques | Enhanced core stability, spine support |
| Inverted Yoga Poses | Entire body | Holistic approach to spinal health, flexibility enhancement |
Incorporating these diverse exercises into your inversion table routine can maximize the benefits of inversion therapy, promoting spinal health, flexibility, and overall well-being. Experiment with different exercises to discover what works best for your body and fitness goals.
How often to use a inversion table
Frequency and Duration of Inversion Table Use
Determining the ideal frequency and duration of inversion table use is key to unlocking the full potential of inversion therapy for back pain relief and spinal health. While individual needs and tolerance levels vary, following these guidelines can help tailor your inversion routine to maximize benefits while minimizing discomfort:
Frequency and Duration of Inversion Table Use
Individualized Approach
- Recognize that the frequency and duration of inversion table use are highly individualized and may vary based on factors such as overall health, back pain severity, and tolerance to inversion therapy.
- Consult with a healthcare professional or physical therapist to determine the most appropriate inversion regimen for your specific needs and conditions.
Gradual Progression
- Start with shorter inversion sessions, typically ranging from 1 to 5 minutes, to allow your body to acclimate to the sensation of inversion.
- Gradually increase both the duration and frequency of your inversion sessions as tolerated, aiming for consistency in your routine while listening to your body’s signals.
Daily vs. Intermittent Use
- Some individuals may benefit from daily inversion sessions to maintain spinal health and alleviate back pain, while others may find relief with just a few sessions per week.
- Experiment with different frequencies and durations to find the optimal balance that provides relief without causing discomfort or strain.
Frequency and Duration Comparison Table
| Frequency/Duration | Description | Importance |
| Individualized Approach | Tailoring inversion regimen based on personal needs and tolerance | Ensures personalized and effective therapy |
| Gradual Progression | Starting with shorter sessions and increasing gradually | Allows body to acclimate to inversion safely |
| Daily vs. Intermittent Use | Balancing frequency of sessions to maintain spinal health and relieve pain | Customizing regimen for optimal results |
By adopting a personalized approach to frequency and duration of inversion table use, you can optimize the benefits of inversion therapy while minimizing the risk of discomfort or adverse effects. Remember to start gradually, listen to your body, and adjust your inversion routine as needed to support your spinal health and overall well-being.
Tips for Beginners
Embarking on your journey with an inversion table can be both exciting and daunting, especially for beginners. To ensure a smooth and safe experience, consider these invaluable tips tailored for newcomers to inversion therapy:
Start with a Shallow Angle
- Initiate your inversion journey with a shallow angle, typically around 20 to 30 degrees, to allow your body to adjust gradually.
- Starting with a gentle inversion angle minimizes the risk of discomfort or dizziness, especially for those new to the practice.
Limit Inversion Duration
- Begin with short inversion sessions, ranging from just a few minutes to no more than five minutes per session.
- Gradually increase the duration of your sessions as your body becomes accustomed to inversion, listening to your body’s cues for any signs of strain or discomfort.
Enhance Comfort with Pillows
- Use pillows or cushions to support your head, neck, and lower back during inversion, enhancing comfort and reducing pressure points.
- Experiment with different pillow placements to find the configuration that provides optimal support and relaxation.
Have Assistance Nearby
- Always have a trusted companion nearby, especially during your initial attempts at inversion or if you experience any discomfort or uncertainty.
- Having someone nearby can provide reassurance and assistance if needed, fostering confidence in your inversion practice.
Tips for Beginners Comparison Table
| Tip | Description | Importance |
| Start with a Shallow Angle | Gradually acclimating to inversion with a gentle angle | Minimizes risk of discomfort or dizziness |
| Limit Inversion Duration | Starting with short sessions and gradually increasing duration | Allows body to adapt safely to inversion |
| Enhance Comfort with Pillows | Using pillows or cushions to support key areas during inversion | Reduces pressure points and enhances relaxation |
| Have Assistance Nearby | Ensuring a companion is nearby for assistance and reassurance | Provides immediate aid in case of uncertainties |
By incorporating these beginner-friendly tips into your inversion routine, you can embark on your inversion therapy journey with confidence and safety. Remember to prioritize gradual progression, comfort, and having a support system in place to make the most of your inversion experience.
Tips for using an inversion table correctly
Inversion Table Maintenance and Care
To ensure the longevity of your inversion table and your safety, it’s essential to perform regular maintenance, such as cleaning the surface, lubricating moving parts, and checking for any signs of wear or damage. Store your inversion table in a dry, stable environment when not in use.
Alternatives to Inversion Tables
While inversion tables can be effective for many people, they’re not suitable for everyone. Alternative methods for relieving back pain and improving spinal health include yoga, physical therapy, chiropractic care, and ergonomic adjustments.
When Not to Use an Inversion Table
There are certain circumstances where using an inversion table may not be advisable, such as if you have high blood pressure, glaucoma, herniated discs, or other serious medical conditions. Always consult with a healthcare professional before starting any new exercise regimen.
Success Stories and Testimonials
Many individuals have experienced remarkable results from using inversion tables, ranging from reduced pain and improved mobility to enhanced overall well-being. Hearing success stories and testimonials can inspire others to explore this alternative therapy option.
Conclusion
Inversion tables offer a unique approach to relieving back pain and promoting spinal health. By understanding how to use them safely and effectively, individuals can experience the numerous benefits they provide. Remember to start slowly, listen to your body, and consult with a healthcare professional if you have any concerns.
FAQs
- Is it normal to feel dizzy when using an inversion table?
- Some people may experience dizziness or lightheadedness initially, especially when inverting at steeper angles. It’s essential to go slowly and gradually acclimate your body to the inverted position.
- Can inversion tables help with sciatica?
- Inversion tables may provide temporary relief from sciatica symptoms by decompressing the spine and reducing nerve pressure. However, it’s essential to consult with a healthcare professional for personalized advice.
- How long should I invert on an inversion table?
- The duration of inversion sessions can vary depending on individual tolerance and comfort level. Start with shorter sessions, around 1-2 minutes, and gradually increase as tolerated.
- Are there any risks associated with using an inversion table?
- While inversion tables can be beneficial, they also pose risks, such as increased intraocular pressure, risk of falls, and aggravation of certain medical conditions. Consult with a healthcare professional before using an inversion table, especially if you have underlying health issues.
- Can children use inversion tables?
- It’s not recommended for children to use inversion tables without supervision and guidance from a healthcare professional. Their developing bodies may not tolerate inversion as well as adults, and there may be increased risks involved.